
Growing sprouts at home is one of the easiest, most rewarding gardening activities you can try. Whether you’re a seasoned gardener or a complete beginner, sprouts offer a fast and simple way to grow highly nutritious food right in your kitchen. Not only are they incredibly easy to grow, but they also pack a nutritional punch. Sprouts are rich in vitamins, minerals, and fiber, making them a perfect addition to a healthy, whole-food plant-based diet.
Growing sprouts at home has many benefits. First, they are incredibly fresh, and you get to enjoy them at their peak nutritional value. Second, by growing your own sprouts, you can control the growing conditions, ensuring that they’re free from harmful pesticides or chemicals. Finally, growing sprouts at home is affordable and helps reduce your environmental footprint, as it’s a sustainable practice that doesn’t require a lot of space or resources.
In this post, we’ll walk you through everything you need to know about growing sprouts, from the types of sprouts you can grow to troubleshooting common issues. If you’ve been considering adding sprouts to your meals, there’s no better time to start than now!
Section 1: Types of Sprouts You Can Grow
1.1 The Best Sprouts for Beginners
Sprouts come in many varieties, and some are easier to grow than others. Here are some of the most popular types of sprouts to start with:
- Alfalfa Sprouts
Alfalfa sprouts are among the easiest to grow, and they’re a favorite for salads and sandwiches. They’re delicate, mild in flavor, and packed with nutrients. - Mung Bean Sprouts
Mung bean sprouts are slightly larger and have a more robust flavor. They’re commonly used in Asian dishes like stir-fries and soups. - Lentil Sprouts
Lentils are another easy-to-grow option. Lentil sprouts have a mild, earthy flavor and can be added to salads, sandwiches, and wraps. - Broccoli Sprouts
Known for their health benefits, broccoli sprouts are packed with antioxidants and compounds like sulforaphane. These are slightly spicier and add a nice kick to dishes. - Radish Sprouts
Radish sprouts have a peppery flavor similar to arugula. They’re great for adding crunch and spice to your meals. - Sunflower Sprouts
These sprouts have a nutty flavor and can grow much larger than other types. They’re perfect for making sprout salads or using as a garnish.
1.2 Which Sprouts Are Easiest to Grow for Beginners?
For beginners, alfalfa, mung beans, and lentils are the best options. They are simple to grow, don’t require complicated care, and typically grow quickly—within 4-7 days. These varieties are also very forgiving and adapt well to various growing conditions, making them perfect for people just starting out with sprouting.
Section 2: Essential Equipment for Growing Sprouts
2.1 What You Need to Grow Sprouts
Growing sprouts doesn’t require much equipment, but you will need a few essential items to get started:
- Sprouting Jars or Trays
A glass jar with a mesh lid is the most common choice for sprouting. You can also use a specialized sprouting tray if you prefer to grow larger quantities at once. - Mesh Lids
Mesh lids are essential for allowing airflow while keeping seeds from falling out. These lids are specifically designed for sprouting jars. - A Bowl for Soaking
A shallow bowl or container will help you soak your seeds before sprouting. Proper soaking helps speed up germination. - Clean Water
Fresh, clean water is vital for sprouting. Avoid using chlorinated tap water, as it can affect sprouting. Filtered or spring water is your best bet.
2.2 Optional Extras
- Sprout Bags
If you want to grow sprouts in larger batches, a sprout bag is a great option. These bags are breathable and easy to use. - Seed Trays
For more extensive sprouting, you can opt for trays that allow you to grow a variety of seeds at once.
Section 3: Step-by-Step Instructions on Growing Sprouts
3.1 Step 1: Select Your Seeds
The first step in growing sprouts is selecting high-quality, organic sprouting seeds. Make sure to choose seeds labeled as “sprouting seeds” to ensure they are free of pesticides and treated chemicals. You can find sprouting seeds at most garden stores or online retailers.
3.2 Step 2: Soak the Seeds
Most sprouts need to be soaked before they begin to germinate. Soak your seeds in water for anywhere between 8 to 12 hours, depending on the type of seed. This step helps soften the seed coat and jump-start the sprouting process.
3.3 Step 3: Rinse and Drain
After soaking, it’s important to rinse and drain the seeds thoroughly. This helps prevent mold from developing. Place the seeds in a sprouting jar or tray and rinse them well with fresh water. Make sure to drain off all excess water, as standing water can cause the seeds to rot.
3.4 Step 4: Place the Seeds in a Sprouting Jar or Tray
Once your seeds are soaked and drained, place them in your sprouting jar or tray. Position the jar in a cool, dark place—such as a kitchen cabinet—for the first couple of days to promote germination.
3.5 Step 5: Continue Rinsing and Draining
Rinse and drain your sprouts twice a day, every 12 hours, to keep them fresh and hydrated. This routine prevents the growth of harmful bacteria and keeps the sprouts growing healthily.
3.6 Step 6: Harvest Your Sprouts
After 4-7 days, your sprouts should be ready to harvest! When they’ve reached the desired size, remove them from the jar or tray, rinse them one last time, and store them in the refrigerator.
Section 4: Troubleshooting Common Issues
4.1 Mold Growth: How to Prevent It
Mold is a common issue when growing sprouts, especially if the seeds aren’t properly drained. To prevent mold growth, make sure to rinse and drain your seeds thoroughly and never leave standing water in your sprouting container. Additionally, try placing your sprouts in a cooler spot to reduce humidity.
4.2 Sprouts Not Growing: What Went Wrong?
If your sprouts aren’t growing, the most common causes are improper soaking times, incorrect temperature, or using old or poor-quality seeds. Always check the seed packet for soaking instructions and ensure your sprouting container is kept in a cool, dark place to promote germination.
Section 5: Storing and Using Your Sprouts
5.1 How to Store Sprouts
Once your sprouts are harvested, rinse them and place them in an airtight container in the refrigerator. They will typically last for 4-7 days, but they are best when eaten fresh. To preserve freshness, avoid storing them in excess moisture.
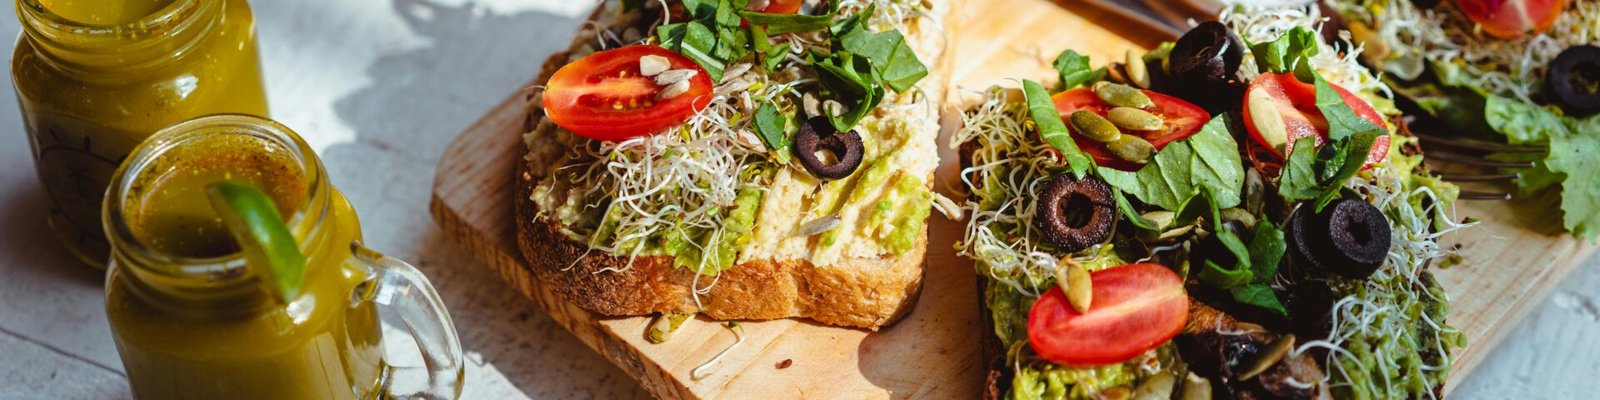
5.2 Creative Ways to Use Fresh Sprouts
Sprouts are versatile and can be added to a wide variety of dishes. Here are some fun ways to incorporate them into your meals:
- Salads: Add a handful of sprouts to any salad for extra crunch.
- Sandwiches and Wraps: Replace lettuce with sprouts for a fresh, nutrient-packed filling.
- Smoothies: Blend sprouts into your smoothies for added vitamins and minerals.
- Stir-fries: Toss sprouts into your stir-fried dishes for texture and flavor.
Conclusion
Growing sprouts is a rewarding and simple activity that anyone can do. With just a few basic supplies, you can produce a continuous supply of fresh, nutritious sprouts to enhance your meals. Whether you’re adding them to your salads, sandwiches, or smoothies, sprouts are an excellent way to boost your nutrition and improve your overall health. So why not give it a try? Start with an easy-to-grow variety like alfalfa or mung beans, and enjoy the many benefits of growing your own food right at home.